





Quite simply, an epoxy tabletop is a great way to make an ordinary piece of wood into a smooth, durable and attractive tabletop. Epoxy resin can be used to highlight the wood grain, add a glossy appearance, help to resist daily use and a multitude of decorative options is available.
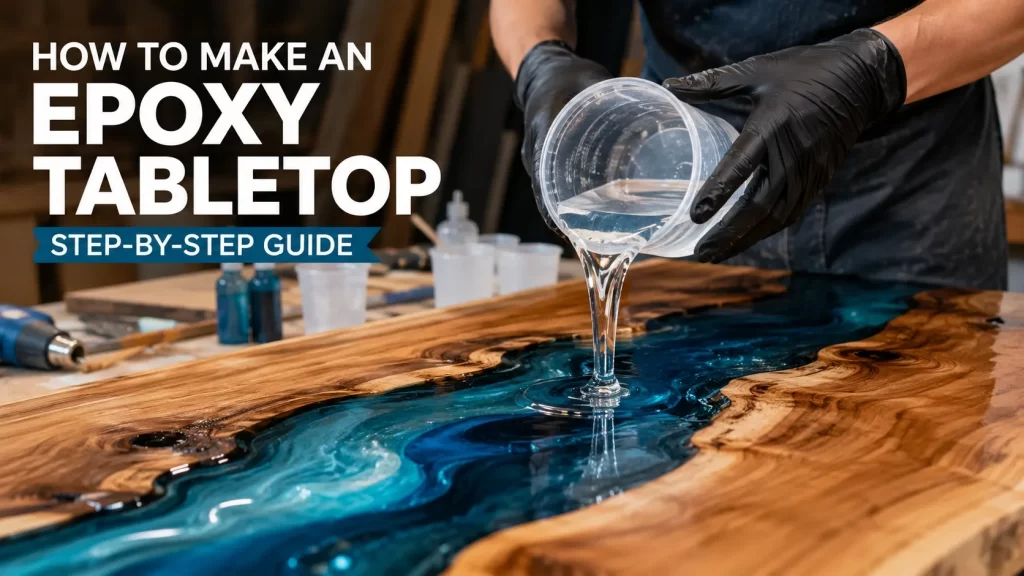
The main important part of the DIY epoxy table is preparation. The final result depends greatly on the accuracy of the measurements, the correct mixing, pouring under control, bubble removal, and adequate curing time. It covers setting up and finishing an epoxy tabletop from start to finish and some common pitfalls as well as some techniques for creating a professional looking surface.
What You Need to Make an Epoxy Tabletop
Set up all materials and tools before you begin. It makes working efficiently easier once the resin is mixed together.
Typical supplies include:
- Tabletop or prepared wood slab
- Tabletop epoxy resin and hardener
- Measuring cups or graduated containers
- Clean mixing buckets
- Stirring sticks
- Plastic spreader or squeegee
- Foam brush
- Rubber gloves
- Safety glasses
- Painter's tape
- Drop cloth or protective tarp
- Clean lint-free cloths
- Heat gun
- Sandpaper or power sander
- Pigments or mica powders, if desired
- Protective finish for the underside
Before mixing always read the manufacturer's instructions. Epoxy systems vary by mixing ratios, working time, maximum pour thickness, curing time and temperature.
Step 1: Prepare the Tabletop
The surface preparation is one of the most crucial parts of an epoxy resin tabletop project.
Use clean, dry, solid wood. Steam off dust, dirt, grease, loose bark and other contaminants. If existing surface finish, see if it must be removed or sanded prior to epoxy application.
Sanding will give the wood surface a mechanical profile which assists the resin to adhere. Focus on corners and edges, cracks and porous areas.
Sand and then clean all the dust. Very small particles may be permanently embedded in the hardened resin.
Work area should also be clean, dry, level and should be protected from dust. Cover table with a tarp or single-use covering to collect resin that drains over the side.
Step 2: Calculate How Much Epoxy You Need
You don't want to half-tire your project with epoxy because you didn't measure the amount you needed in advance, so determine how much epoxy you need before you start mixing.
Measure the tabletop's:
- Length
- Width
- Intended coating depth
The basic volume calculation is:
Length × Width × Depth = Required Volume
For example, if a rectangular tabletop is 60 inches long and 24 inches wide and you plan a 1/8-inch coating:
60 × 24 × 0.125 = 180 cubic inches
You can then change the cubic inches to the unit of volume used by the epoxy manufacturer.
Leave a little extra material for resin that is absorbed into porous wood, material that remains in mixing containers, and resin that overflows.
A seal coat is followed by a flood coat for many tabletop projects. The seal coat is a relatively thin coat that seals the porous areas and the flood coat is the main coat of glossy surface. Always follow the resin manufacturer's specification for the actual thickness. The source tutorial, for instance, explains a 1/16" seal coat and a 1/8" flood coat.
Step 3: Mix the Epoxy Correctly
The tabletop only can be hard, clear and well cured if it is properly mixed.
The most common tabletop epoxy systems use a ratio of one part epoxy to one part water, but don't take this ratio for granted. Follow directions for the product.
Accurately measure Part A and Part B. If more control is desired, measure each component in separate containers and combine them in a clean container.
Mix very gently and evenly. Scrape the side and bottom of the container, stirring to ensure that unmixed material is not left in corners.
Do not use aggressive mixing as it may introduce too much air into the resin. It's hand-mixing that's recommended in the original tutorial and that the mixture might be cloudy at first before becoming clear as the ingredients mix.
Never add pigments, colorants, alcohol or other additives unless they are compatible with your epoxy system.
Step 4: Apply a Seal Coat
A thin seal coat before the pour can enhance the results if working with porous wood.
Apply a little mixed epoxy to the tabletop and smooth it out with a plastic spreader or squeegee. Gently knead the resin towards the outside, don't over work it.
Be extra careful about cracks, pores, knots and end grain. These can trap air in the material which can be released at a later time to form bubbles in the epoxy.
Follow the directions for the seal coat to cure.
A seal coat is especially important as it helps eliminate air that can escape from porous wood during the primary flood coat. Whether or not you need one is dependent on the wood and epoxy system you use.
Step 5: Pour the Flood Coat
After the seal coat has cured to the proper degree, lay on the main epoxy coat.
Spread the mix of resin over the tabletop in a few lines or sections.
Apply epoxy using a spreader. Let the resin run its course towards the edges.
Table top epoxy tends to be self leveling, do not repeatedly brush or scrape the surface. Too much handling can cause bubbles and an uneven finish.
Keep an eye on the edges. Resin will pour over them but use a foam brush or an appropriate tool to keep them drips-free and clean edges.
Step 6: Remove Surface Bubbles
It is normal for there to be small bubbles when pouring the epoxy.
Surface bubbles can be carefully removed using a heat gun. Keep the heat source above the resin and do not allow it to touch resin surface and do not stand still.
Freezing small and quick passes is better than focusing heat into one area.
Excessive heat can cause damage to the epoxy, waves, or cause the epoxy to cure unevenly or even scorch the surface. The original tutorial explicitly calls for the heat gun to be a few inches above the epoxy and continuously moving.
Because more bubbles can form during the early curing stage due to the release of air from the wood, periodically check the tabletop.
Step 7: Allow the Epoxy to Cure
Curing requires patience.
Keep the table off of dust, hair, insects, moisture, vibration and accidental contact while curing the epoxy. Maintain project in the recommended temperature range of the manufacturer.
Do not consider curing based on outward appearance. The surface of epoxy can be hard but the inside may be softer.
Wait for the manufacturer recommended cure time before sanding, flipping, drilling, hardware installation or heavy objects on the tabletop.
Step 8: Inspect and Finish the Edges
After the epoxy has cured sufficiently, inspect the tabletop carefully.
Look for:
- Uneven areas
- Dust particles
- Small imperfections
- Edge drips
- Sharp corners
- Remaining bubbles
The drips under the tabletop and the smoothing of rough edges were performed using sand.
If further coating of the surface is needed, lightly prepare as directed by the epoxy manufacturer before applying a second coat.
If a good finish is desired and if an epoxy of a finer finish is used, a series of finer sanding can be followed by polishing.
Step 9: Seal the Underside
Never ignore a baseboard of a wooden tabletop.
Top can be coated with epoxy and bottom is bare wood. Movement may be caused by changes in the amount of moisture in the wood.
Once the top is cured, and the tabletop can be safely turned over, sand off any resin drips from the bottom. Then a compatible protective coating can be applied to the bottom.
The Upstart Epoxy tutorial sanded the cured drips of the epoxy on the wood and then sealed the bottom with polyurethane.The Upstart Epoxy tutorial sanded the cured drips of the epoxy on the wood and then overcoated the bottom with polyurethane.
Common Epoxy Tabletop Mistakes to Avoid
Incorrect Mixing Ratio
Using too much resin or hardener can interfere with curing. Measure both components accurately.
Incomplete Mixing
Unmixed material can leave sticky, soft, or cloudy areas. Scrape the sides and bottom of the mixing container thoroughly.
Mixing Too Aggressively
Fast mechanical mixing can introduce excessive air bubbles. Slow, controlled mixing is usually preferable for tabletop applications.
Pouring Too Thick
Every epoxy has a maximum recommended pour depth. Exceeding it can cause excessive heat generation, cracking, bubbles, or curing problems.
Skipping Surface Preparation
Dust, oil, moisture, and loose material can prevent proper adhesion and become permanently trapped beneath the coating.
Using Excessive Heat
A heat gun is useful for surface bubbles, but excessive heat can damage the finish.
Rushing the Cure
A tabletop can be ready for use before the finish has reached its final hardness. Allow sufficient curing time before installation and/or heavy usage.
How to Get a Professional Epoxy Tabletop Finish
It's best to take it slow and steady.
Ensure a clean work area, accurate measurements, careful mixing, level work surface and monitor the epoxy during early cure. When incorporating colour, always colour on a small scale initially.
In decorative work, powders of mica and pigments (that are compatible) can produce marble, stone, metallic or artistic effect. The amount of colorant should be kept within the resin manufacturer's recommendation, however.
Most importantly, use an epoxy which is designed for tabletop use. Typically, table top resin is designed to give a controlled flow, a level surface and a long-lasting decorative surface finish. Other epoxy systems, such as deep pour types, could have different viscosities and properties.
Final Thoughts
While it's not a complicated process to make an epoxy tabletop, it does take some preparation and attention to detail. Every step from measuring resin to mixing with Part B, applying a seal coat, pouring the flood coat, defoaming, and curing time has an impact on the appearance of the finish.
These are the important elements in a successful epoxy table: The correct substrate preparation, the right resin system, and the controlled application. This allows DIYers, woodworkers and professionals to produce a smooth, durable, good-looking epoxy resin tabletop for dining tables, desks, countertops, coffee tables and any other furniture project, without making common mistakes and following the manufacturer's instructions.