





Epoxy resin and wood make an excellent combination for making the perfect furniture, wall art, DIY craft, tabletops, decorative items, and countertops. The natural grain of wood gives a warm and characterful finish, and epoxy resin gives a smooth, shiny and protective finish.
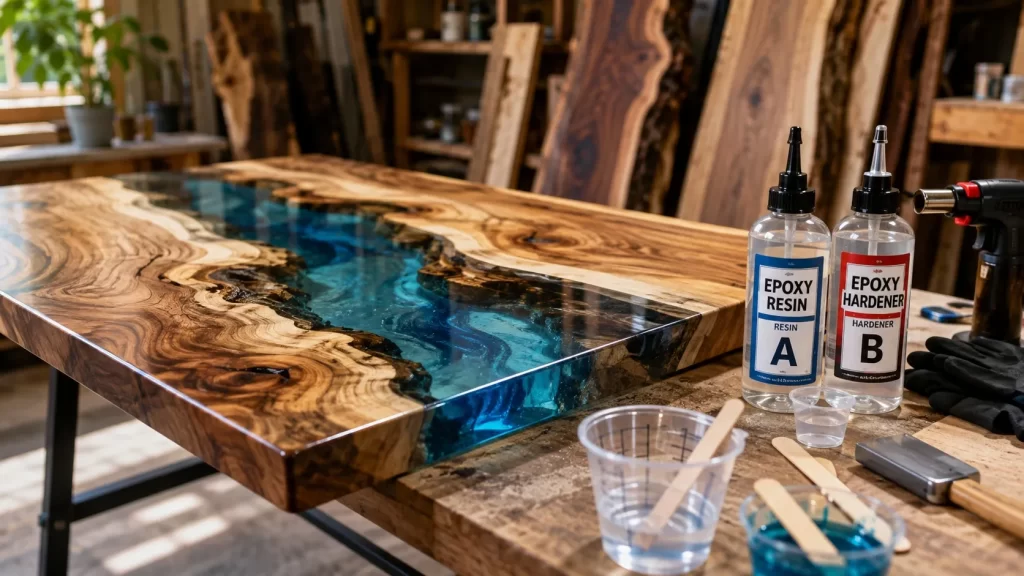
Knowing how to use epoxy resin on wood is key to getting a professional finish on your epoxy river table, filling cracks in a wood slab, coating a countertop or even a small wood project.
Learn how to select the best epoxy resin, prepare wood, mix and apply the epoxy, avoid bubbling, and cure the project correctly and surface finishing.
What Is Epoxy Resin for Wood?
Epoxy resin is a two-part material, which is composed of resin and hardener. Once mixed in the correct ratio (as directed by the manufacturer), a chemical reaction takes place and the liquid slowly turns into a hard, solid material.
Epoxy resin can be used for various purposes when applied to wood. It can be used to fill cracks and knots, join wood sections together, add color to wood for decorative purposes, or be used to provide a shiny protective finish. It is especially favored in the realm of live-edge furniture as it can be highlighted with transparent or colored epoxy to enhance the natural form and grain of the wood.
The final appearance will depend on the type of epoxy used, the type of wood, the pigments used, how the epoxy is applied and the curing conditions.
1. Choose the Right Epoxy Resin
Choosing the right epoxy resin is one of the most crucial steps.
Not all epoxies will serve the same purpose. There are both thin coating epoxy and deeper pour epoxy which can be used for sealing and finishing surfaces, as well as for thicker applications. Use a product that is "Table Designed" for the desired pour depth for large projects like river tables.
Here are some things to take into account when selecting epoxy resin for wood:
- Pour depth: Check the manufacturer's maximum recommended thickness.
- Curing time: Slower-curing products may provide more working time.
- Clarity: Choose a clear formula when you want to highlight natural wood grain.
- UV resistance: UV-resistant epoxy can help reduce yellowing over time.
- Hardness: Select an epoxy suitable for furniture, crafts, or other intended applications.
- Mixing ratio: Always follow the manufacturer's specified resin-to-hardener ratio.
Using the wrong epoxy can result in overheating, incomplete curing, cracking, excessive bubbles, or a poor surface finish.
2. Select and Prepare the Wood
Good results start with properly prepared wood.
Hardwoods such as maple, walnut, oak, cherry, and similar species are commonly used in resin woodworking. The choice ultimately depends on the appearance, strength, and application you want.
The wood should be dry and free from contaminants. Moisture trapped inside the wood can interfere with curing and may contribute to cloudiness, bubbles, discoloration, or adhesion problems. Kiln-dried wood is often a practical choice for epoxy projects.
Before applying epoxy:
- Remove loose bark, dirt, and debris.
- Cut the wood to the desired shape.
- Sand rough areas and edges.
- Remove all sanding dust.
- Make sure the surface is clean and dry.
- Check that the wood is properly supported and level.
Sanding with the grain helps create a suitable surface for epoxy adhesion. After sanding, vacuum the surface and wipe away remaining dust with a clean, lint-free cloth.
3. Seal the Wood Before the Main Pour
When mixing epoxy resin and wood, one of the best methods is to apply a thin coat initially.
Epoxy can trap air in wood and this can be released when epoxy is applied. Those voids can travel through the resin to create bubbles.
This undesirable effect can be minimized by filling some of the pores in the wood with a thin epoxy seal coat before the main layer is poured. It also may contribute to an even finish.
Wait for the seal coat to dry properly on the surface of the car before using.
4. Measure and Mix Epoxy Resin Carefully
Measurement is an essential part of the process and is crucial.
Follow mixing ratio as recommended by the epoxy manufacturer. This may be a 1:1 ratio with some products or varying proportions are necessary with others. Don't assume that all epoxy systems have the same ratio.
Use proper measuring equipment to accurately measure resin and hardener. Combine and slowly and thoroughly mix all of the components together.
Do not stir too aggressively as this may add too much air into the mixture.
Scrape side and bottom of mixing container, while stirring, to thoroughly mix resin and hardener.
When adding colour, pigments, mica powder or other additives, ensure that they are compatible with the epoxy and are used within recommended limits.
5. Pour Epoxy Resin Slowly
After it's mixed, start pouring the epoxy into the wood.
Don't pour too much in one place. A controlled pour minimizes the amount of air that gets trapped, and allows you to control the appearance of the finished product.
When working with larger woodworking tasks, epoxy might need to be applied in layers. Follow manufacturer's guidelines for max thickness and recoating windows.
Maintain level position of the workpiece throughout the process. If the surface is not smooth, the resin will run into one direction causing an uneven coating.
Once poured, use a spreader or appropriate tool to spread the epoxy evenly.
6. How to Remove Bubbles from Epoxy Resin
One of the most popular issues with using epoxy resin over wood is bubbles.
Some bubbles are produced from the mixing, and others from the air bubbles that are trapped in the pores of the wood.
Surface bubbles can be released using a heat gun or appropriate torch. Gently move the heat source over the surface, don't leave it in one spot.
High temperatures can lead to issues like ripples, overheating, surface defects or early curing.
Prep is generally more effective than heat alone for larger projects. You can minimize the bubbles by 1) using a clean, dry wood surface, 2) applying a seal coat, 3) mixing slow and 4) pouring slowly.
7. Protect the Project During Curing
Once the epoxy has been poured, cover the project from dust, hair, dirt and other air borne particles.
A cover or enclosure to prevent spills from landing on the surface until the epoxy has cured can be helpful.
Temperature also matters. Cure according to manufacturer's recommended conditions and refrain from any abrupt changes in temperature or humidity.
The epoxy may become “touch dry” in a few hours, but that doesn't necessarily mean it is hard. Many products need significantly longer to attain their final characteristics.
Avoid the removal of molds, clamps or supports prematurely. The damage to the surface or shift of the project may result from premature handling.
8. Sand and Polish the Cured Epoxy
After the epoxy has completely dried, try to check the surface.
If you spot small imperfections, ripples or any uneven surfaces, sanding may be able to smooth them out.
Start with a coarse or medium grit and work up to a fine grit. Clean up sanding dust between stages.
Polishing compounds may be used after fine sanding for a high gloss.
If additional epoxy layers are to be applied on top of cured epoxy, lightly sand with sanding sponge prior to the application of the subsequent layer. A slight roughness guarantees mechanical adhesion of the new layer.
9. Common Epoxy Resin Problems and Solutions
Sticky or Soft Epoxy
Some of the most common causes of sticky resin are inaccurate measurement, lack of mixing, poor environmental conditions or insufficient curing.
Follow manufacturer's recommendations and allow extra curing time if necessary. If the material is not cured, a section could be cut away and replaced.
Cloudy Epoxy
Cloudiness may be caused by moisture or temperature issues, contaminants, or by the nature of the resin itself.
Apply and cure in suitable environmental conditions, using dry wood.
Excessive Bubbles
Excess air can be introduced into the resin when the resin is mixed too vigorously, or air can be released from porous wood.
Apply seal coat, mix slowly and apply controlled heat where appropriate.
Poor Adhesion
If you're bonding a surface to a different material, dust, oil, moisture, wax or other contaminants may be present that can interfere with bonding.
The wood should always be cleaned, dried and sanded.
10. Safety When Working With Epoxy Resin
Always plan for safety!
Use suitable protective eye and gloves when mixing and applying epoxy. Ventilate and follow the safety guidelines given by the resin manufacturer.
Use appropriate respiratory protection and dust-control when sanding cured epoxy. Do not contact uncured resin and hardener.
Always read the safety data and instructions on the product before beginning your project.
11. How to Maintain Epoxy Wood Projects
With proper maintenance, epoxy resin and wood will appear the same.
Wipe with a soft cloth and mild soap or manufacturer's recommended cleaner. Avoid abrasive pads and aggressive chemicals that may dull or damage the finish.
Avoid placing epoxy wood furniture in direct sunlight or in extreme heat conditions. Apply coasters, mats or heat-resistant pads to tables and counter tops.
Sand and polish can be used to restore a surface for minor scratches. If damage is more severe, a professional refinishing or a new epoxy coating may be necessary.
Frequently Asked Questions
Can you put epoxy resin directly on wood?
Yes. Wood can be treated with epoxy resin; however, the wood surface needs to be clean, dry, appropriately prepared, and clear of contaminants. Thin seal coat can also help prevent bubbles from porous wood.
What is the best wood for epoxy resin?
Common woods are walnut, maple, oak and cherry. The quality of wood required depends on the visual quality, strength specifications, moisture and function of the project.
Does wood need to be sealed before epoxy?
Sealing is not always required, but it may be advisable particularly for porous wood. A seal coat can help to minimize air release and provide a more even finish.
How long does epoxy resin take to cure on wood?
The curing time will vary depending on the type of epoxy system, ambient temperature, humidity, pour thickness and product formulation. Please refer to the manufacturer's curing schedule, do not use a universal time.
How do you prevent bubbles in epoxy resin on wood?
Carefully prepare the wood, seal wood, slowly mix, slowly pour, and use controlled heat to remove surface bubbles. Avoid overheating the epoxy.
Final Thoughts
Woodworking skills are brought to the use of epoxy resin on wood and are added to the versatility of the modern resin materials. By using the correct epoxy, preparing the wood appropriately, mixing correctly, pouring under control, and allowing enough curing time, long-lasting and attractive pieces can be made.
The key word is preparation. Achieving a professional-looking finish can be the difference between an amateur job and a professional one with this advice on drying wood, providing a clean surface, using the proper resin ratios, providing a proper working environment and patience when curing.
With the basics of epoxy resin on wood, you can get more predictable and desirable outcomes whether you are making an epoxy river table, filling wood cracks, coating a countertop or playing with resin art.