





Polyurethane is one of the most effective finishes for preventing scratches, moisture, stains and general wear on wood, and at the same time can improve its natural appearance. Obtaining a fine, well-formed surface finish, however, is not just a matter of brushing the polyurethane onto a surface.
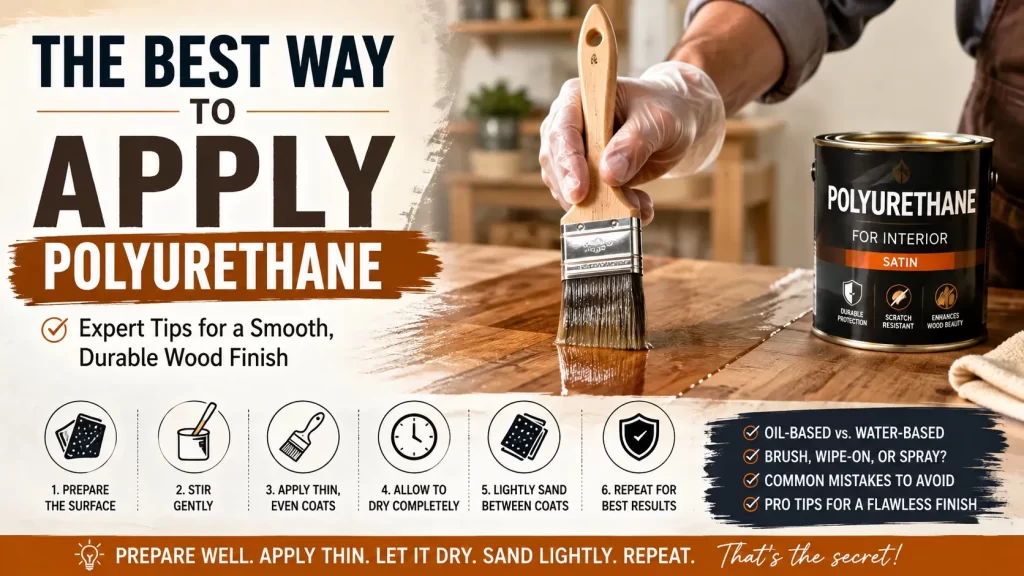
Application of polyurethane will vary depending on type of finish, wood surface, applicator and degree of care taken to prepare and sand between coats. In this guide, we’ll show you how to apply polyurethane to wood step-by-step, and compare the differences between oil-based polyurethane and water-based polyurethane, as well as some tips and tricks to avoid bubbles, brush marks, drips, and uneven finishes.
What Is Polyurethane?
Polyurethane is a protective wood finish which creates a hard, glossy layer on the surface. It prevents furniture, countertops, cabinets, tables, floors, and woodworking from getting water damage, scratches, stains and from being used often.
There are two main types of polyurethane:
- Oil-based polyurethane: Provides excellent durability and adds a warm amber tone to wood.
- Water-based polyurethane: Dries faster, produces less odor, and generally preserves the natural color of light-colored wood.
With oil-based polyurethane, it may require more time to dry between coats, while water-based polyurethane might be recoated in a few hours. Always read and respect the drying and application instructions of the manufacturer.
Oil-Based vs. Water-Based Polyurethane
Choosing the right polyurethane is the first step toward achieving a professional finish.
| Feature | Oil-Based Polyurethane | Water-Based Polyurethane |
|---|---|---|
| Appearance | Warm, amber tone | Clear, natural appearance |
| Drying time | Usually longer | Usually faster |
| Odor | Stronger | Mild |
| Cleanup | Mineral spirits | Soap and water |
| Durability | Excellent | Very good |
| Best for | Floors, tables, dark wood | Light wood, painted furniture |
Oil-based polyurethane can be used for darkening the surface of a wood piece. For maple, birch, pine or other lighter woods, water-based polyurethane is sometimes a better option for maintaining the original appearance.
What You Need to Apply Polyurethane
When beginning your project, check off all your tools and materials. Get it all ready so there will be no interruptions during the wet finish.
You may need:
- Polyurethane
- High-quality finishing brush
- 220-grit sandpaper
- 320-grit sandpaper for final smoothing when appropriate
- Tack cloth
- Vacuum
- Clean mixing container
- Stir stick
- Lint-free cloth
- Mineral spirits for compatible oil-based products
- Gloves and appropriate protective equipment
The type of brush is also important. The type of brush used depends on the type of polyurethane selected; an oil-based finish is often applied with a quality natural-bristle brush, and a synthetic nylon or polyester brush is typically used with a water-based polyurethane.
The Best Way to Apply Polyurethane: Step by Step
Step 1: Prepare the Wood Surface
Surface preparation is arguably the most important part of the process.
The first step is to sand the wood and make it as smooth as possible without any obvious blemishes. A 220 grit sandpaper is suitable for finishing many projects. Always sand towards the grain of the wood and not against it.
After sanding:
- Vacuum the entire surface.
- Remove remaining fine dust with a tack cloth.
- Inspect the wood under good lighting.
- Check for scratches, dents, or rough areas.
- Correct imperfections before applying polyurethane.
One of the major factors that can contribute to a rough polyurethane finish is dust. The wet coating can trap even the smallest of particles.
When a stain is used on the wood, let it dry thoroughly before using polyurethane. This drying time will vary depending on the stain and conditions, please refer to the manufacturer's instructions.
Step 2: Stir the Polyurethane—Don't Shake It
Do not shake a can of polyurethane prior to use. Shaking can also introduce air bubbles into the finish that can become visible in the form of small bumps or imperfections on the wood.
Rather, use a clean stir stick to gently mix the polyurethane.
Certain oil-based polyurethane products might need to be thinned for specific projects, but not all oil-based polyurethane products can be thinned. Before adding mineral spirits or another thinner, be sure to read and follow the product manufacturer's instructions.
Thinning may be recommended; if so, make it easier to apply and lessen contamination to the original can by mixing in a separate container.
Step 3: Choose the Right Applicator
For most furniture and woodworking projects, a quality finishing brush provides excellent control.
Natural-bristle brushes are commonly recommended for oil-based polyurethane because they hold the finish well and can produce smooth coverage.
Synthetic brushes are generally preferred for water-based polyurethane because natural bristles can absorb water and lose their shape.
Foam brushes can work for certain small projects, but inexpensive foam applicators may introduce bubbles or distribute the finish unevenly. Chip brushes can also shed bristles and are generally not ideal when appearance is important.
For the best results, choose an applicator designed for the specific polyurethane you're using.
Step 4: Apply a Thin, Even First Coat
The secret to a smooth polyurethane finish is thin, controlled coats.
Dip only part of the brush into the finish. Let excess polyurethane drain naturally rather than aggressively wiping the brush against the edge of the container.
Then:
- Start in a manageable section.
- Apply polyurethane with long strokes.
- Follow the direction of the wood grain.
- Maintain a consistent application speed.
- Avoid excessive brushing.
- Lightly smooth the surface at the end of the stroke.
This final light pass is sometimes called "tipping off." It helps level the finish and reduce visible brush marks.
Most importantly, don't repeatedly brush an area after the polyurethane has started becoming tacky. Going back over partially dried finish can create ridges, bubbles, and uneven areas.
Step 5: Let the First Coat Dry Completely
Drying time varies significantly between polyurethane products.
Water-based polyurethane may be ready for another coat after several hours, while oil-based polyurethane generally requires considerably longer. Temperature, humidity, ventilation, coat thickness, and the specific product can all affect drying time.
Do not rely solely on a fixed number of hours. If the surface still feels sticky or soft, give it additional drying time.
Applying another coat too soon can trap solvents and create a soft or uneven finish.
Step 6: Sand Between Coats
Light sanding between coats helps remove small imperfections and gives the next coat a better surface to adhere to.
Once the previous coat has fully dried:
- Use fine sandpaper, commonly around 220 grit.
- Sand lightly rather than aggressively.
- Focus on removing dust particles and minor imperfections.
- Vacuum the surface afterward.
- Wipe away remaining dust with a tack cloth.
You are not trying to remove the polyurethane. The goal is simply to smooth the surface and prepare it for the next coat. Home Depot also recommends sanding between coats and removing sanding residue before recoating.
Step 7: Apply Additional Coats
Apply the second coat using the same controlled technique.
For furniture and many indoor woodworking projects, two or three coats can provide a good balance of appearance and protection. High-wear surfaces may require additional coats.
Remember that several thin coats are generally better than one thick coat. Thick applications are more likely to develop runs, bubbles, soft spots, and long drying times.
Allow every coat to dry according to the product instructions, then lightly sand and remove dust before applying the next coat.
Step 8: Apply the Final Coat
The final coat deserves extra attention because it becomes the visible finished surface.
Before applying it, make sure the workspace is as clean and dust-free as possible. Use long, smooth strokes and avoid overworking the finish.
In general, avoid sanding the final coat unless the product instructions specifically recommend it or you are performing a separate polishing process after complete curing.
Allow the finish to cure fully before placing heavy objects on the surface or subjecting it to significant wear.
How to Get the Smoothest Polyurethane Finish
If your goal is a glass-smooth polyurethane finish, focus on consistency rather than speed.
Keep the Workspace Clean
Dust can settle on wet polyurethane and create a rough texture. Clean the work area before starting and minimize unnecessary movement while the finish is drying.
Avoid Thick Coats
Thick coats may look faster, but they often cause more problems. Thin applications dry more consistently and are easier to control.
Follow the Wood Grain
Applying polyurethane with the grain helps minimize visible application marks and creates a more natural appearance.
Don't Overwork the Finish
Once the polyurethane has been properly spread and leveled, leave it alone. Excessive brushing can introduce bubbles and brush marks.
Maintain Suitable Conditions
A moderate, stable working environment is generally easier for finishing. Avoid extremely cold, hot, humid, or dusty conditions unless the product specifically allows them.
Common Polyurethane Problems and Solutions
Brush Marks
Brush marks are often caused by poor-quality brushes, thick coats, excessive brushing, or polyurethane that is beginning to dry.
Solution: Use a quality applicator, apply thinner coats, and avoid repeatedly brushing the same area.
Bubbles
Bubbles can result from shaking the polyurethane, aggressive brushing, or an unsuitable application technique.
Solution: Stir gently instead of shaking, use smooth strokes, and avoid excessive agitation.
Runs and Drips
Runs usually happen when too much polyurethane is applied, especially on vertical surfaces.
Solution: Apply thinner coats and inspect edges while the finish is still workable. Once a drip has dried, carefully level it, sand the area, remove dust, and apply another coat.
Rough or Dusty Finish
A rough finish is frequently caused by dust settling on wet polyurethane.
Solution: Thoroughly clean the work area, vacuum the surface, use a tack cloth, and minimize airborne dust during drying.
Sticky Polyurethane
A finish that remains sticky may be caused by thick application, insufficient drying time, unsuitable environmental conditions, or compatibility issues between products.
Solution: Give the finish additional drying time and consult the manufacturer's instructions before attempting repairs.
Brush, Wipe-On, or Spray: Which Is Best?
There isn't one perfect application method for every project.
Brush-on polyurethane is an excellent all-purpose option for tables, cabinets, shelves, and other relatively flat surfaces. It provides good control and builds a durable coating efficiently.
Wipe-on polyurethane can be useful for curved surfaces, spindles, legs, and detailed components. Because the coating is thinner, more applications may be necessary.
Spray polyurethane can provide an even coating on intricate shapes and hard-to-reach areas, but it requires appropriate ventilation, overspray control, and careful application.
For many DIY wood projects, a quality brush remains the simplest starting point.
How Many Coats of Polyurethane Do You Need?
The optimum number is determined by the product and application.
For standard furniture applications, 2-3 coats might be sufficient to get a durable finish. The number of coats and the level of protection needed for other high-traffic surfaces like floors depends on the product and manufacturer's recommendations and will be specified as 3 or more in this case.
Pay attention to surface preparation, thin application, drying time and sanding between coats, rather than limiting attention to number of coats.
Frequently Asked Questions
What is the best way to apply polyurethane to wood?
The best way to do it is to prepare the wood well, use the proper applicator, work thin coats parallel to the grain, let the wood dry well between coats, and lightly sand between coats.
Is a brush or rag better for polyurethane?
For larger flat surfaces, a brush would work best for good control and effective application of coat. A lint-free cloth may be helpful for wiping polyurethane, or smooth and curved surfaces.
Should I sand between polyurethane coats?
Most often, when polyurethane is being applied, light sanding between coats is helping to eliminate imperfections and create a smoother surface for the next coat. Follow product directions carefully.
How do I prevent brush marks in polyurethane?
Use a good brush, apply thin coats, work with the grain, press lightly on the brush and do not over brush or when the finish begins to become tacky.
Can you apply polyurethane over stained wood?
Yes, a layer of polyurethane can be applied over stained wood. But the stain has to be dry and the polyurethane-friendly. Dry stains according to manufacturer's instructions.
Final Thoughts
The answer to the question of the best way to apply polyurethane isn't so much about how much to apply, as it is how to apply it. Use a smooth, clean surface, the appropriate polyurethane and applicator, thin coats, adequate drying time and, where necessary, lightly sand between coats.
A natural-bristle brush will work well for oil-based polyurethane. A good synthetic brush would be preferable for water-based polyurethane. First and foremost, do not rush the process.
By following these steps and being patient, DIY woodworkers can easily create a smooth and long-lasting polyurethane finish, so that the wood can truly shine.